Make a Stunning Photo Backdrop with Peel and Stick Wallpaper
A backdrop for photographs is known as a photo backdrop. Depending on the situation, many different sizes and kinds of backdrops exist.
They may be monochrome, hand-painted, creative, or abstract when employed by professional event photographers, whether they are working in a studio or on-site (think schools), or they might depict a landscape, often something pastoral like waterfalls, woods, rainbows, or holiday-themed (Christmas or Halloween are among the most popular). They may be vinyl, muslin, cotton, canvas, or other materials.
But in our business, picture backdrops are often constructed of vinyl. This resilient and flexible material works exceptionally well for outdoor events. Vinyl backgrounds come in various sizes, colors, and print patterns. They also have a matte surface option for better picture effects.
Two categories of vinyl backgrounds exist:
For stationary objects like people or automobiles, the square models are employed
The lengthier backdrops, also known as step and repeat banners, are used as backgrounds for red-carpet events when visitors stroll one after another while stopping for photographs or interviews.
Of course, photo backgrounds are available for purchase or rental as standalone items or as kits with all the extras needed to shoot excellent pictures: You may also need supports, frames, clamps, lights, carrying cases, picture umbrellas, and stanchions if you’re seeking for a photographic background.
Making your photographic background has several benefits.
The project is adaptable. There are many possibilities and kinds of backgrounds available.
It is less expensive to make your background. You don’t need to spend a fortune to get excellent results.
- Making up new versions is entertaining.
- To create a unique background, you may utilize several materials.
- And it’s simpler than you would imagine.
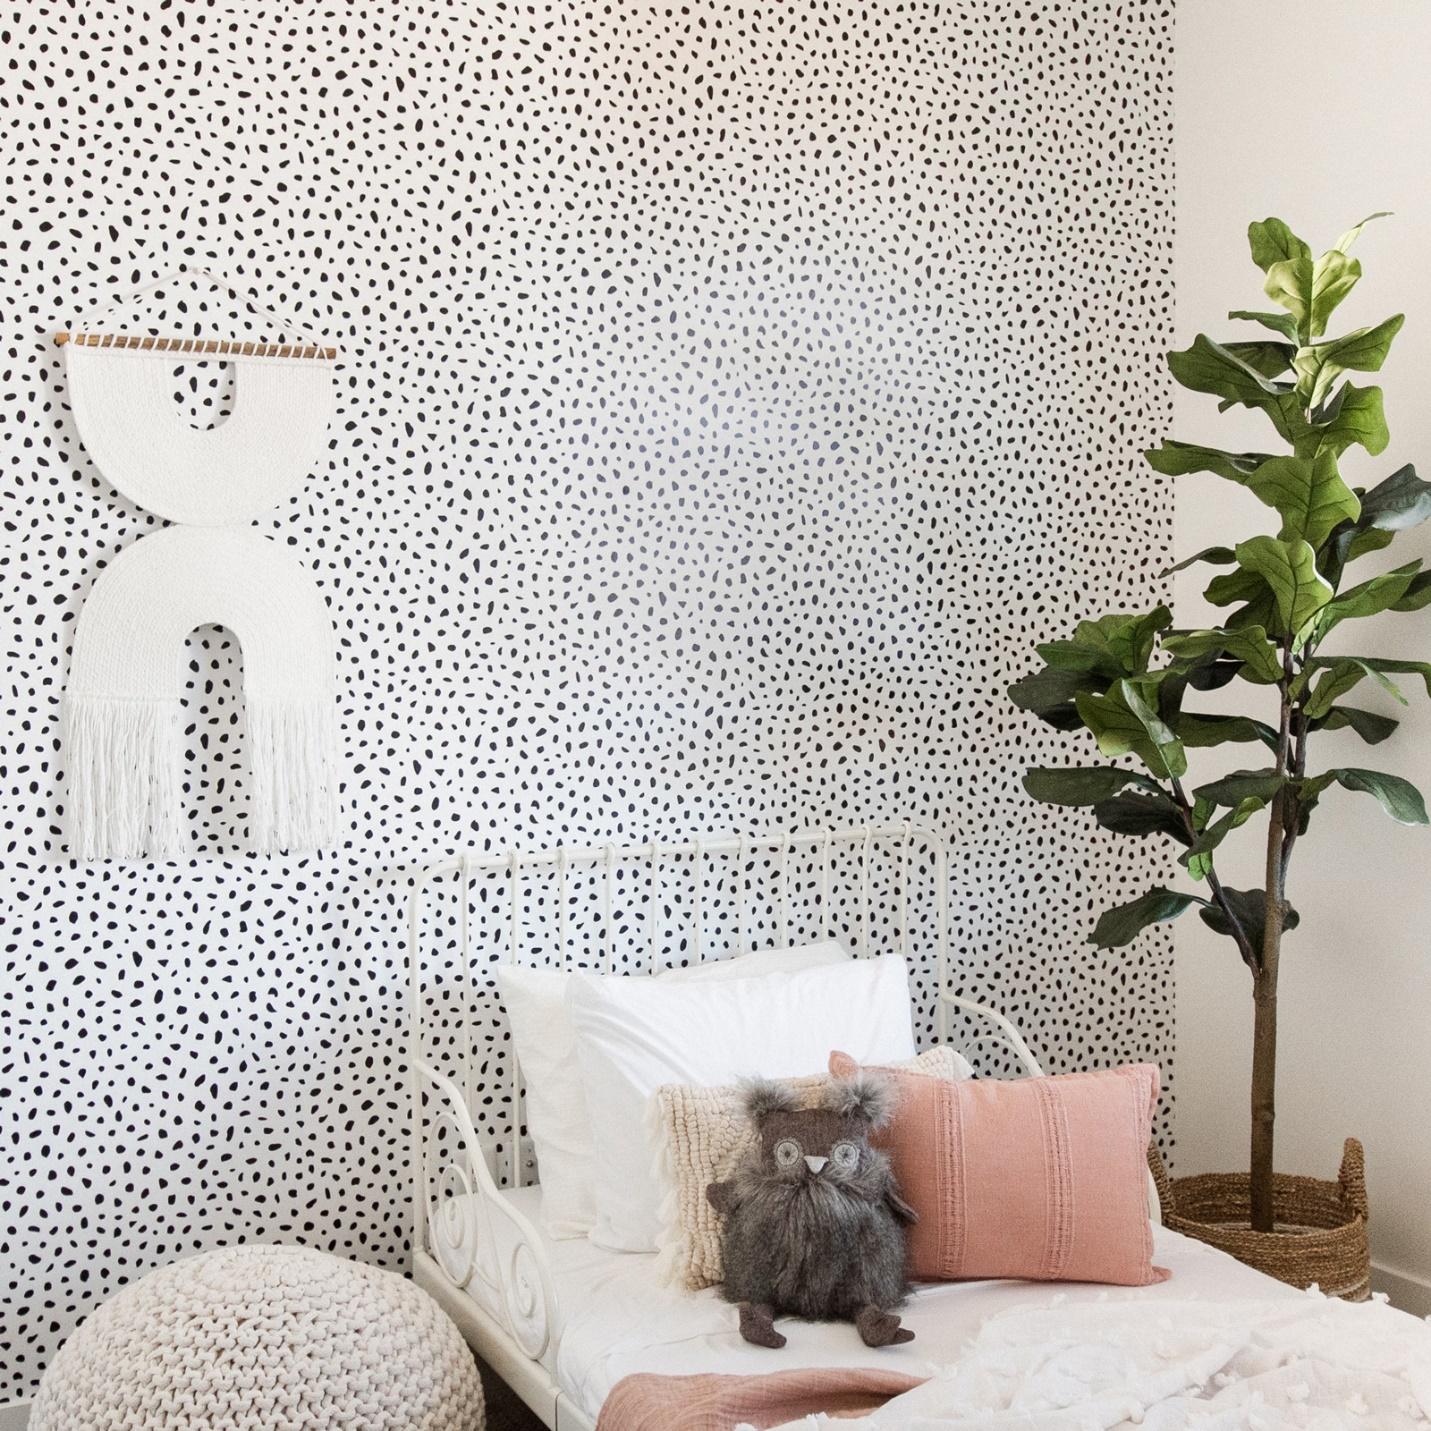
- Create A Beautiful Photo Backdrop Using custom wallpaper
Make a Photo Backdrop with Peel and Stick Wallpaper
Get wallpaper from LOVE VS DESIGN, along with water and a plastic container to combine and store the wallpaper paste, a brush, a mixing tool made of wood, an old credit card for deflating air bubbles, a pencil, scissors, and an MDF board. Love vs design provides much peel-and-stick wallpaper with best quality like solid color wallpaper etc.
- You will have one or more wallpaper strips. I had three pieces. Start at the left side of the board when placing the first strip, and then draw a vertical line across the board using a pencil to have pencil lines on the board and to know precisely where to position the remaining strips; repeat the process with all of them.
- You must combine 4 liters (1 US gallon) of water with the Peel and Stick Wallpaper adhesive kit that is included with your wallpaper. I anticipated it would provide a sizable amount of peel-and-stick wallpaper paste. Still, I eyeballed it because I had no clue what the paste’s consistency should be. I divided the packet into about four equal portions, limiting my ability to combine more than one part with a liter of water.
- I stirred the mixture with an old wooden chopstick until it had the consistency of thick pudding.
- After brushing wallpaper paste over the initial portion of the board that had been pencil-traced and a bit above the vertical line, I put the first third of the wallpaper strip right away. I applied it gently, using the board’s left edge as a guide, and then smoothed the surface with my hand’s palm.
- After brushing wallpaper paste on the other portions of the board, I subsequently put the subsequent wallpaper strips. To ensure that your wallpaper pattern fits together precisely on the board, provide the horizontal dotted lines from the top of your wallpaper to perfectly match outside your board when you apply the strips.
- Be cautious if you have any adhesive spills on the surface of your Peel and Stick Wallpaper (particularly on the seams), as they could leave some unsightly stains on your board if not cleaned up with a card. Use the card to remove any air bubbles. If that occurs, wipe away the excess with a moist towel before the paste dries.
- Trim the tops of each strip where surplus paper is on the outside before utilizing your new Photo Backdrop!